File Tab
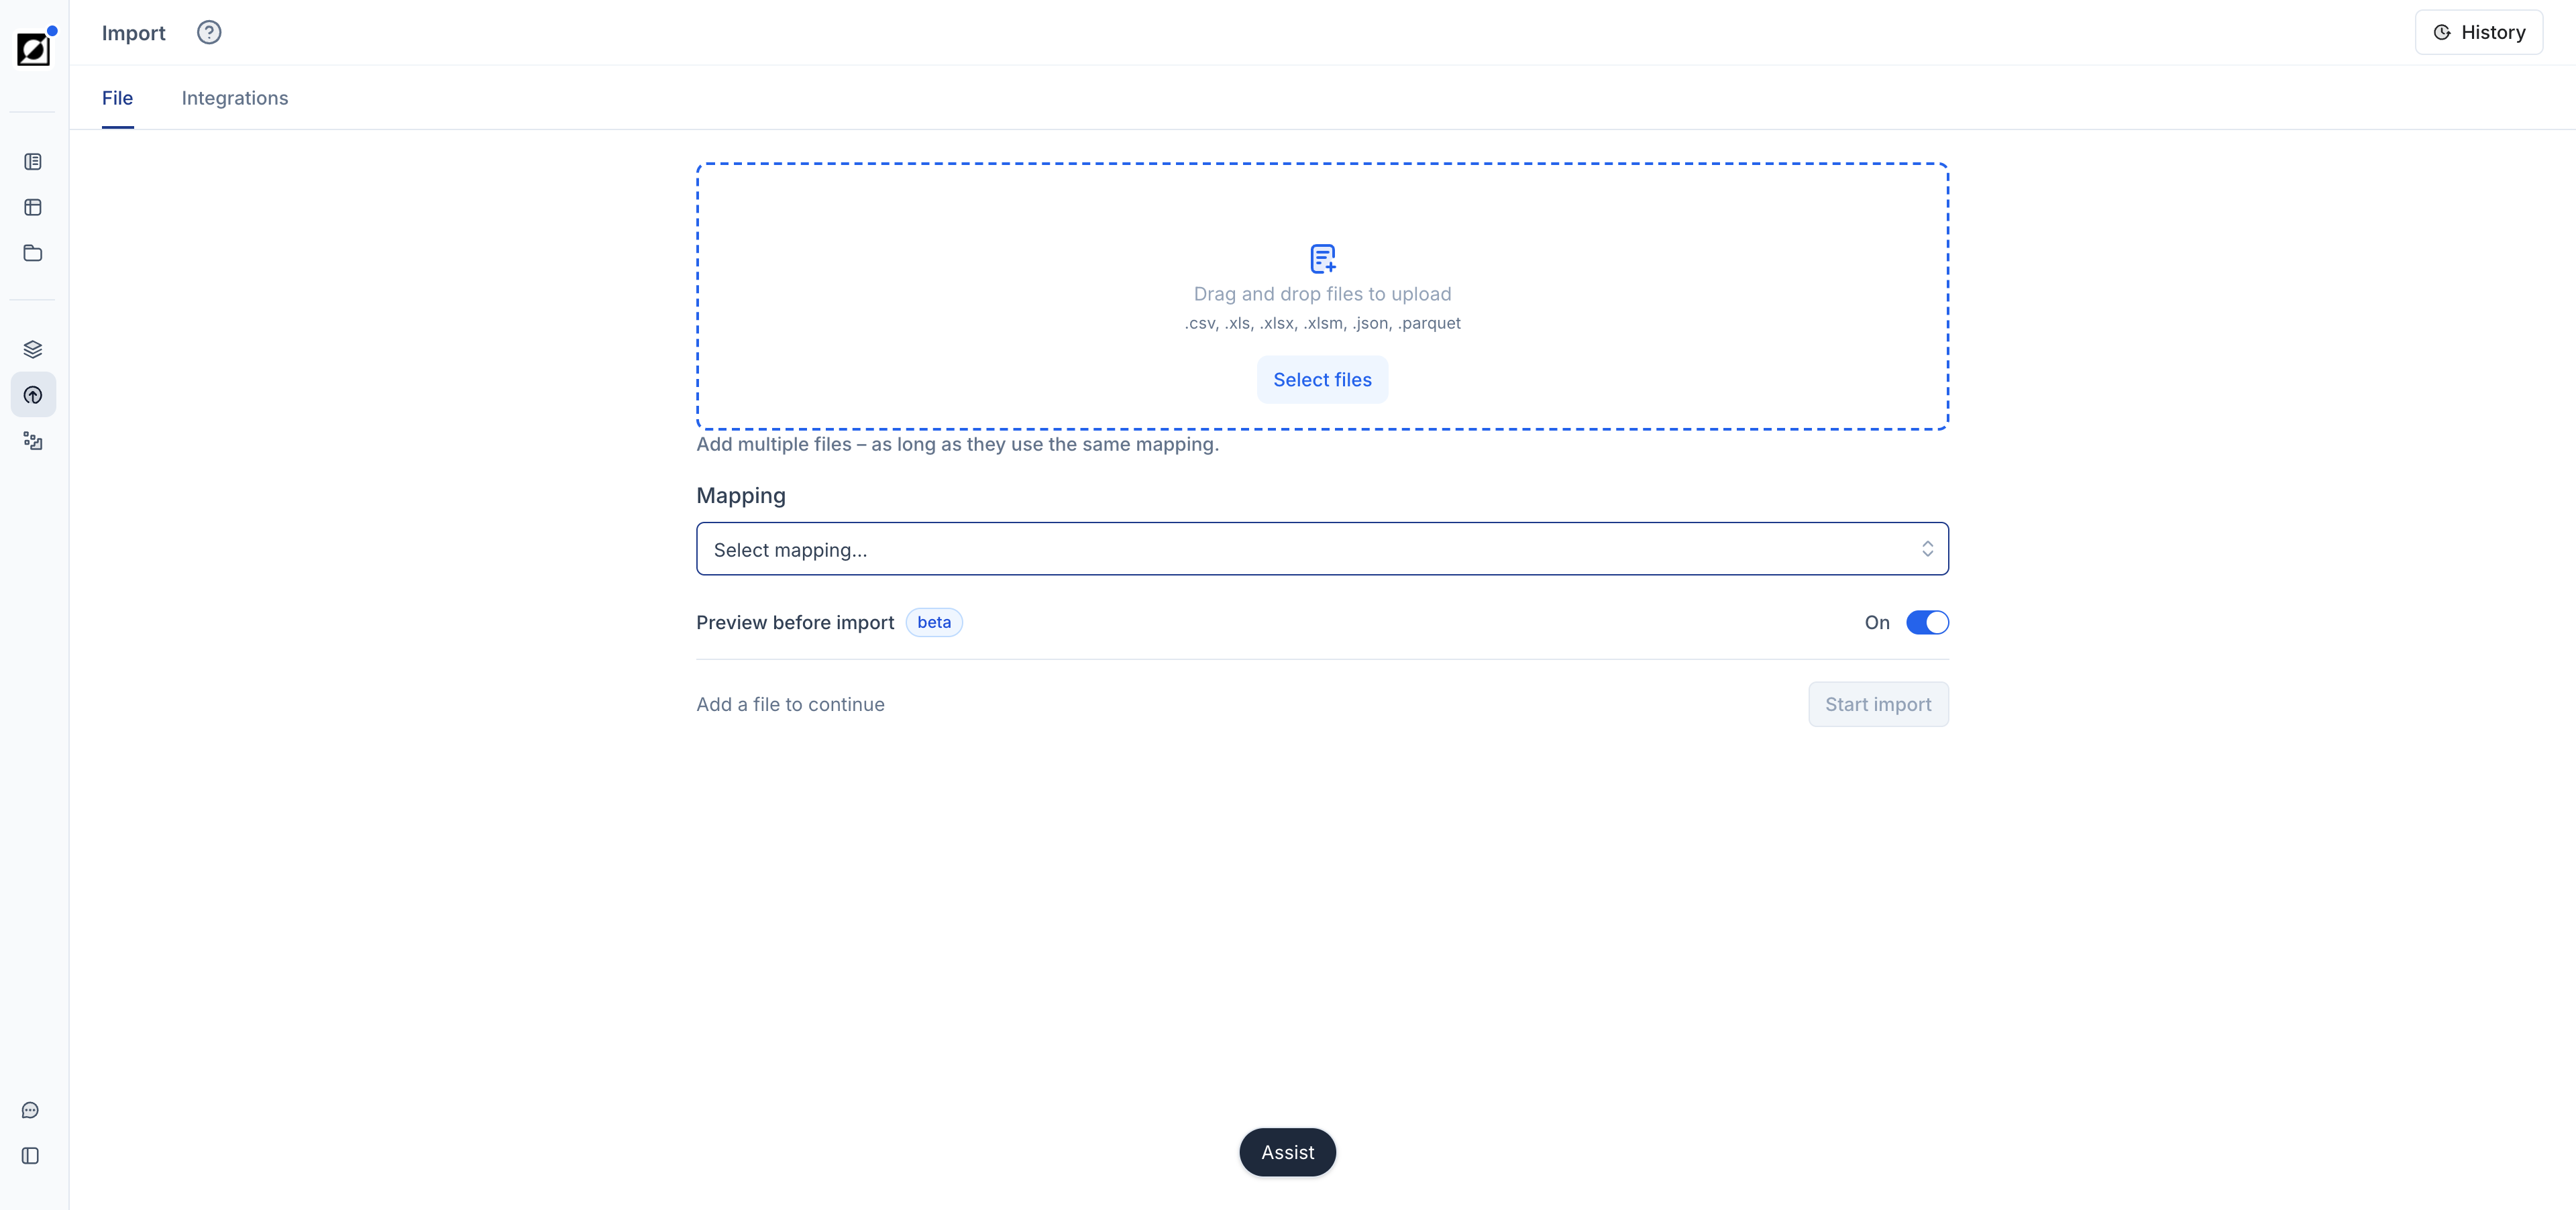
This is the primary method for uploading bioprocess data from files. Pick a file, choose a mapping, and press Start import to start the import.
-
Step 1: File Picker
Select one or more files from your computer using the file picker. Supported file extensions are .csv, .xls, .xlsx, .xlsm, .json, .parquet, .lcd, and .dino. Not every mapping supports every file type; if the selected mapping cannot read the file, the page reports it before the import starts. You can upload multiple files at once, as long as they use the same mapping. It is recommended to carefully review files before importing to avoid importing faulty data.
-
Step 2: Mapping Picker
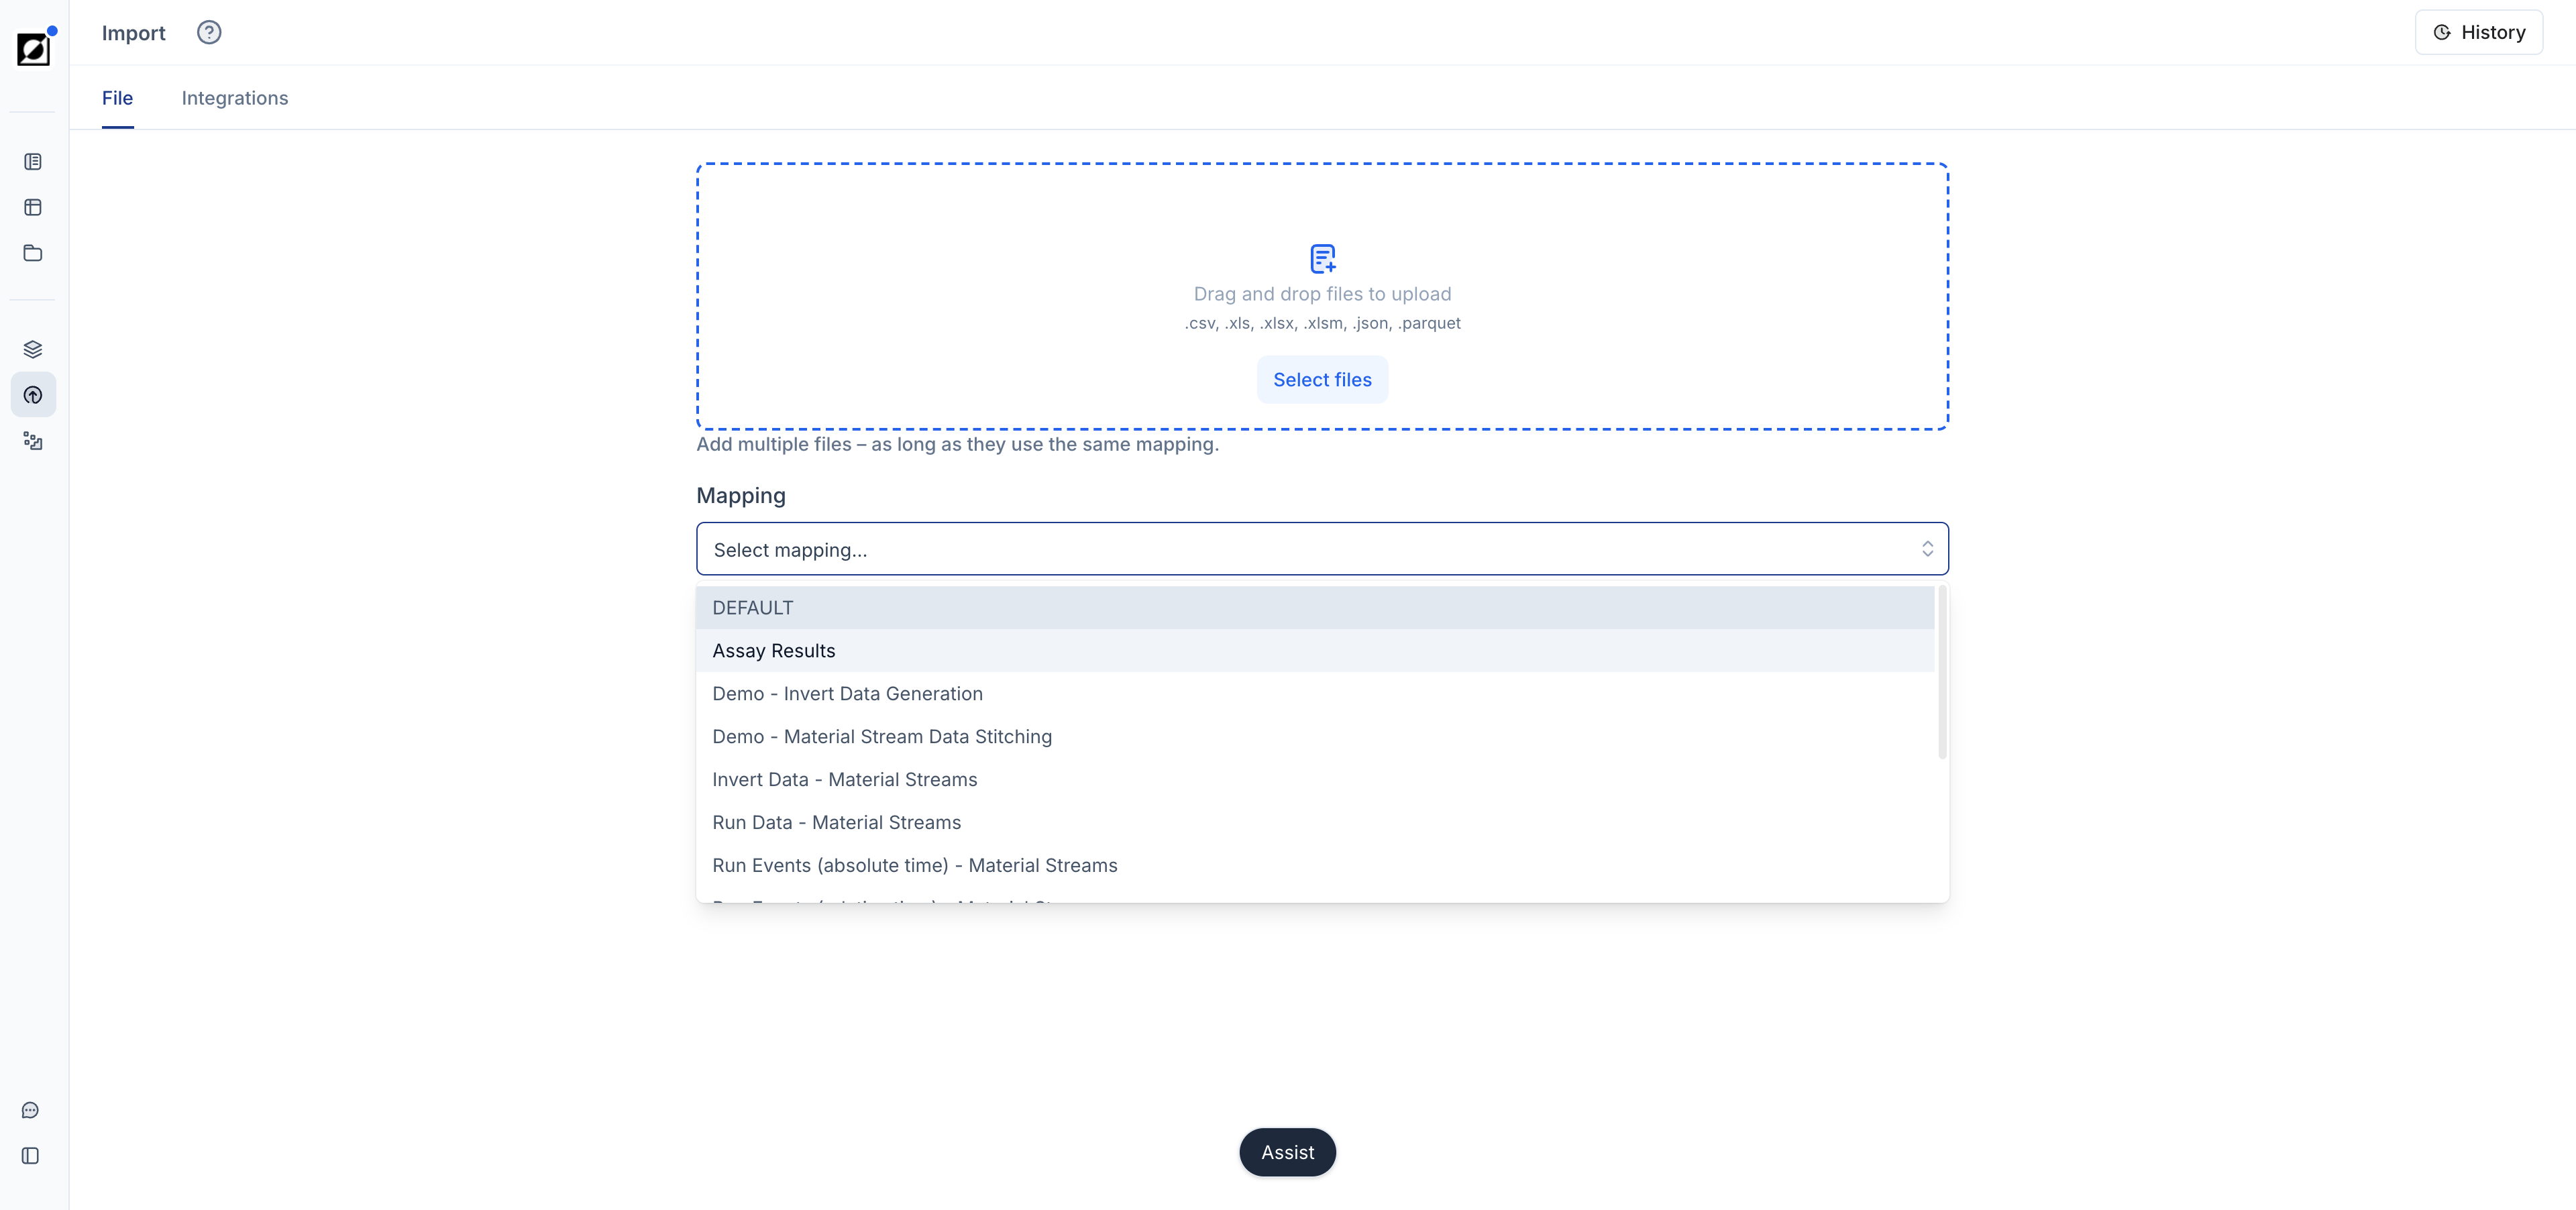
Select the mapping that best fits your data structure. Mappings are available for run data, timeseries data, run events, and Invert export files; your organization can also have custom mappings. Custom mappings can be added to the list upon request. When a mapping has an example, the page shows Example (partial) data below the picker, with Download template to get a blank file in the expected structure. Refer to the Mapping Guide below for more information on a particular mapping.
-
Step 3: Settings (Timeseries Data Only)
When importing timeseries data, set Timeseries Import Mode to either Merge or Replace. Choose Merge to update an existing dataset by either overwriting or appending data. Alternatively, select Replace to discard the existing timeseries data for the imported metrics on the selected runs and replace it entirely with the imported data.
Mappings that use relative time convert the time column into absolute time at import, based on the current run start time. If you change the run start time later, re-import the data.
-
Step 4: Start Import
Click Start import to start the import. This will direct you to the Importing page where you can review Import details for more information on import status. Depending on the file size, the import may take up to several minutes to complete.
-
Step 5: Import Evaluation
-
Step 5.1: Successful File Uploads
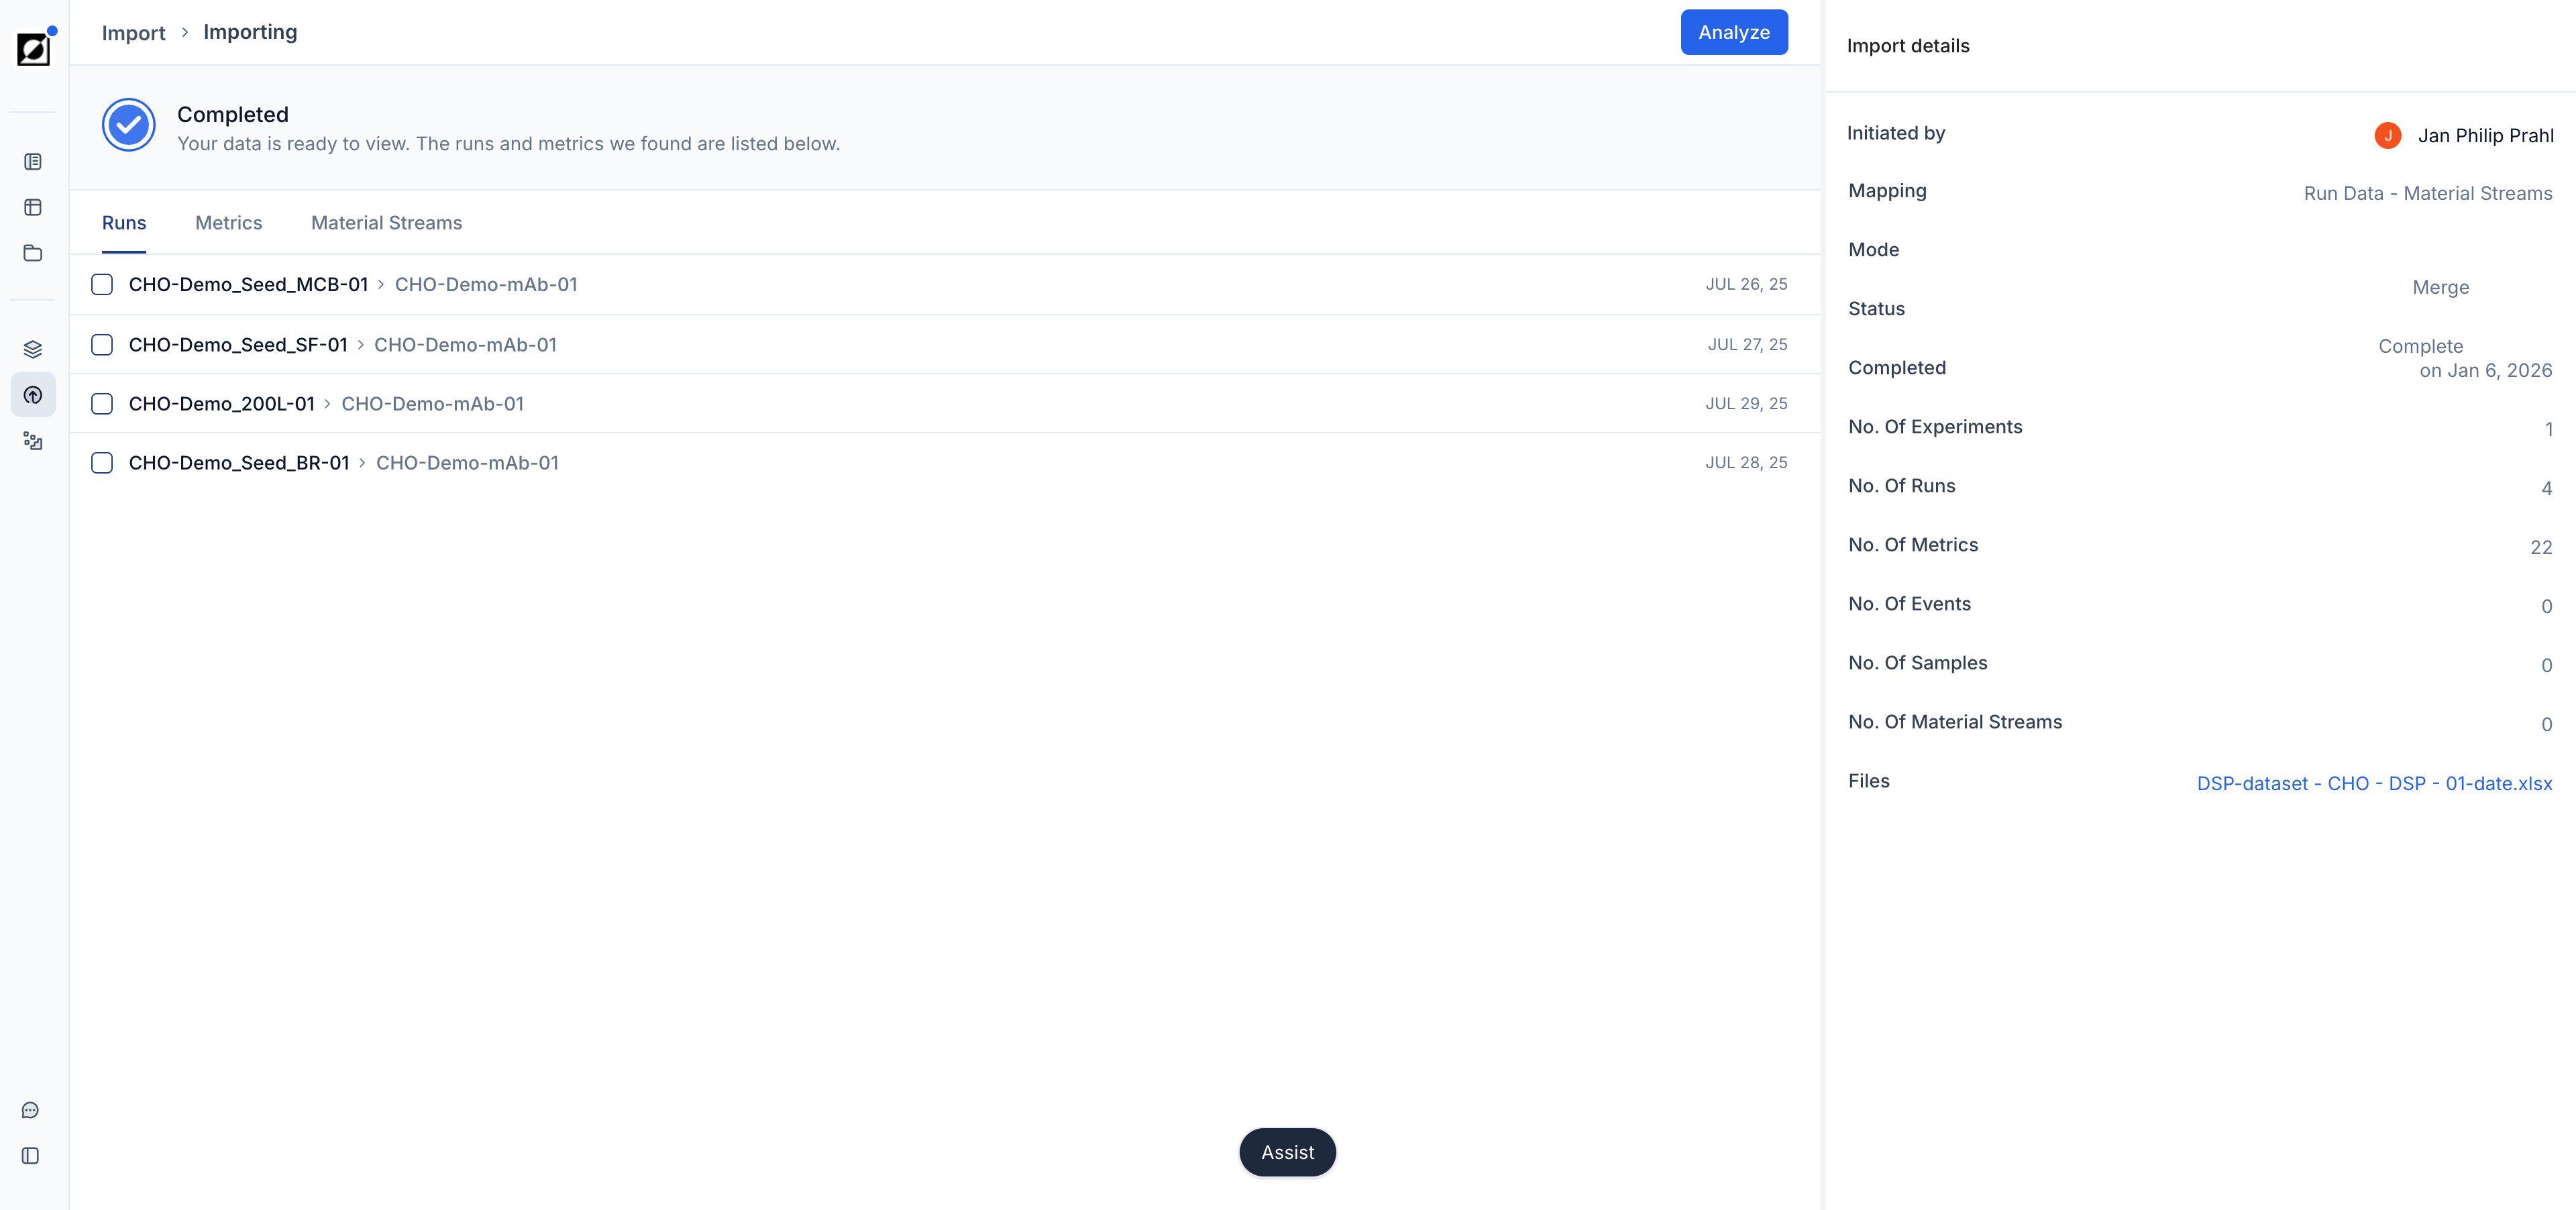
After importing, review the summary to confirm the data added to Invert. The imported filename heads the page. A status headline (such as “Import completed,” “Import failed,” or “Dismissed”) shows the import duration and who ran it and when. Rows show counts for imported data — runs, metrics, properties, timeseries, events, material streams, formulas, lineages, experiments, and projects — and open the corresponding list filtered to this import. The Import details card summarizes the source, mapping, files, and other import information. Use Analyze to start a new report from the imported data. You can edit and re-upload files to update or replace data in the app as needed.
-
Step 5.2: Failed imports
Failed imports may occur if the source file contains unexpected or incomplete data, or if the file structure is not supported by the selected mapping. The failure card names the problem (for example, “File could not be parsed,” “Mapping is invalid,” or “Import timed out”). The headline shows whether no data was imported (“Import failed”) or only part was imported (“Import failed partway through”). Verify that the file meets the mapping criteria. For organizations with Assist enabled, use Fix with Assist on the failed import to diagnose the failure and stage a corrected import for your review. Contact Invert support via Help & support if you need further assistance.
-
Import Preview
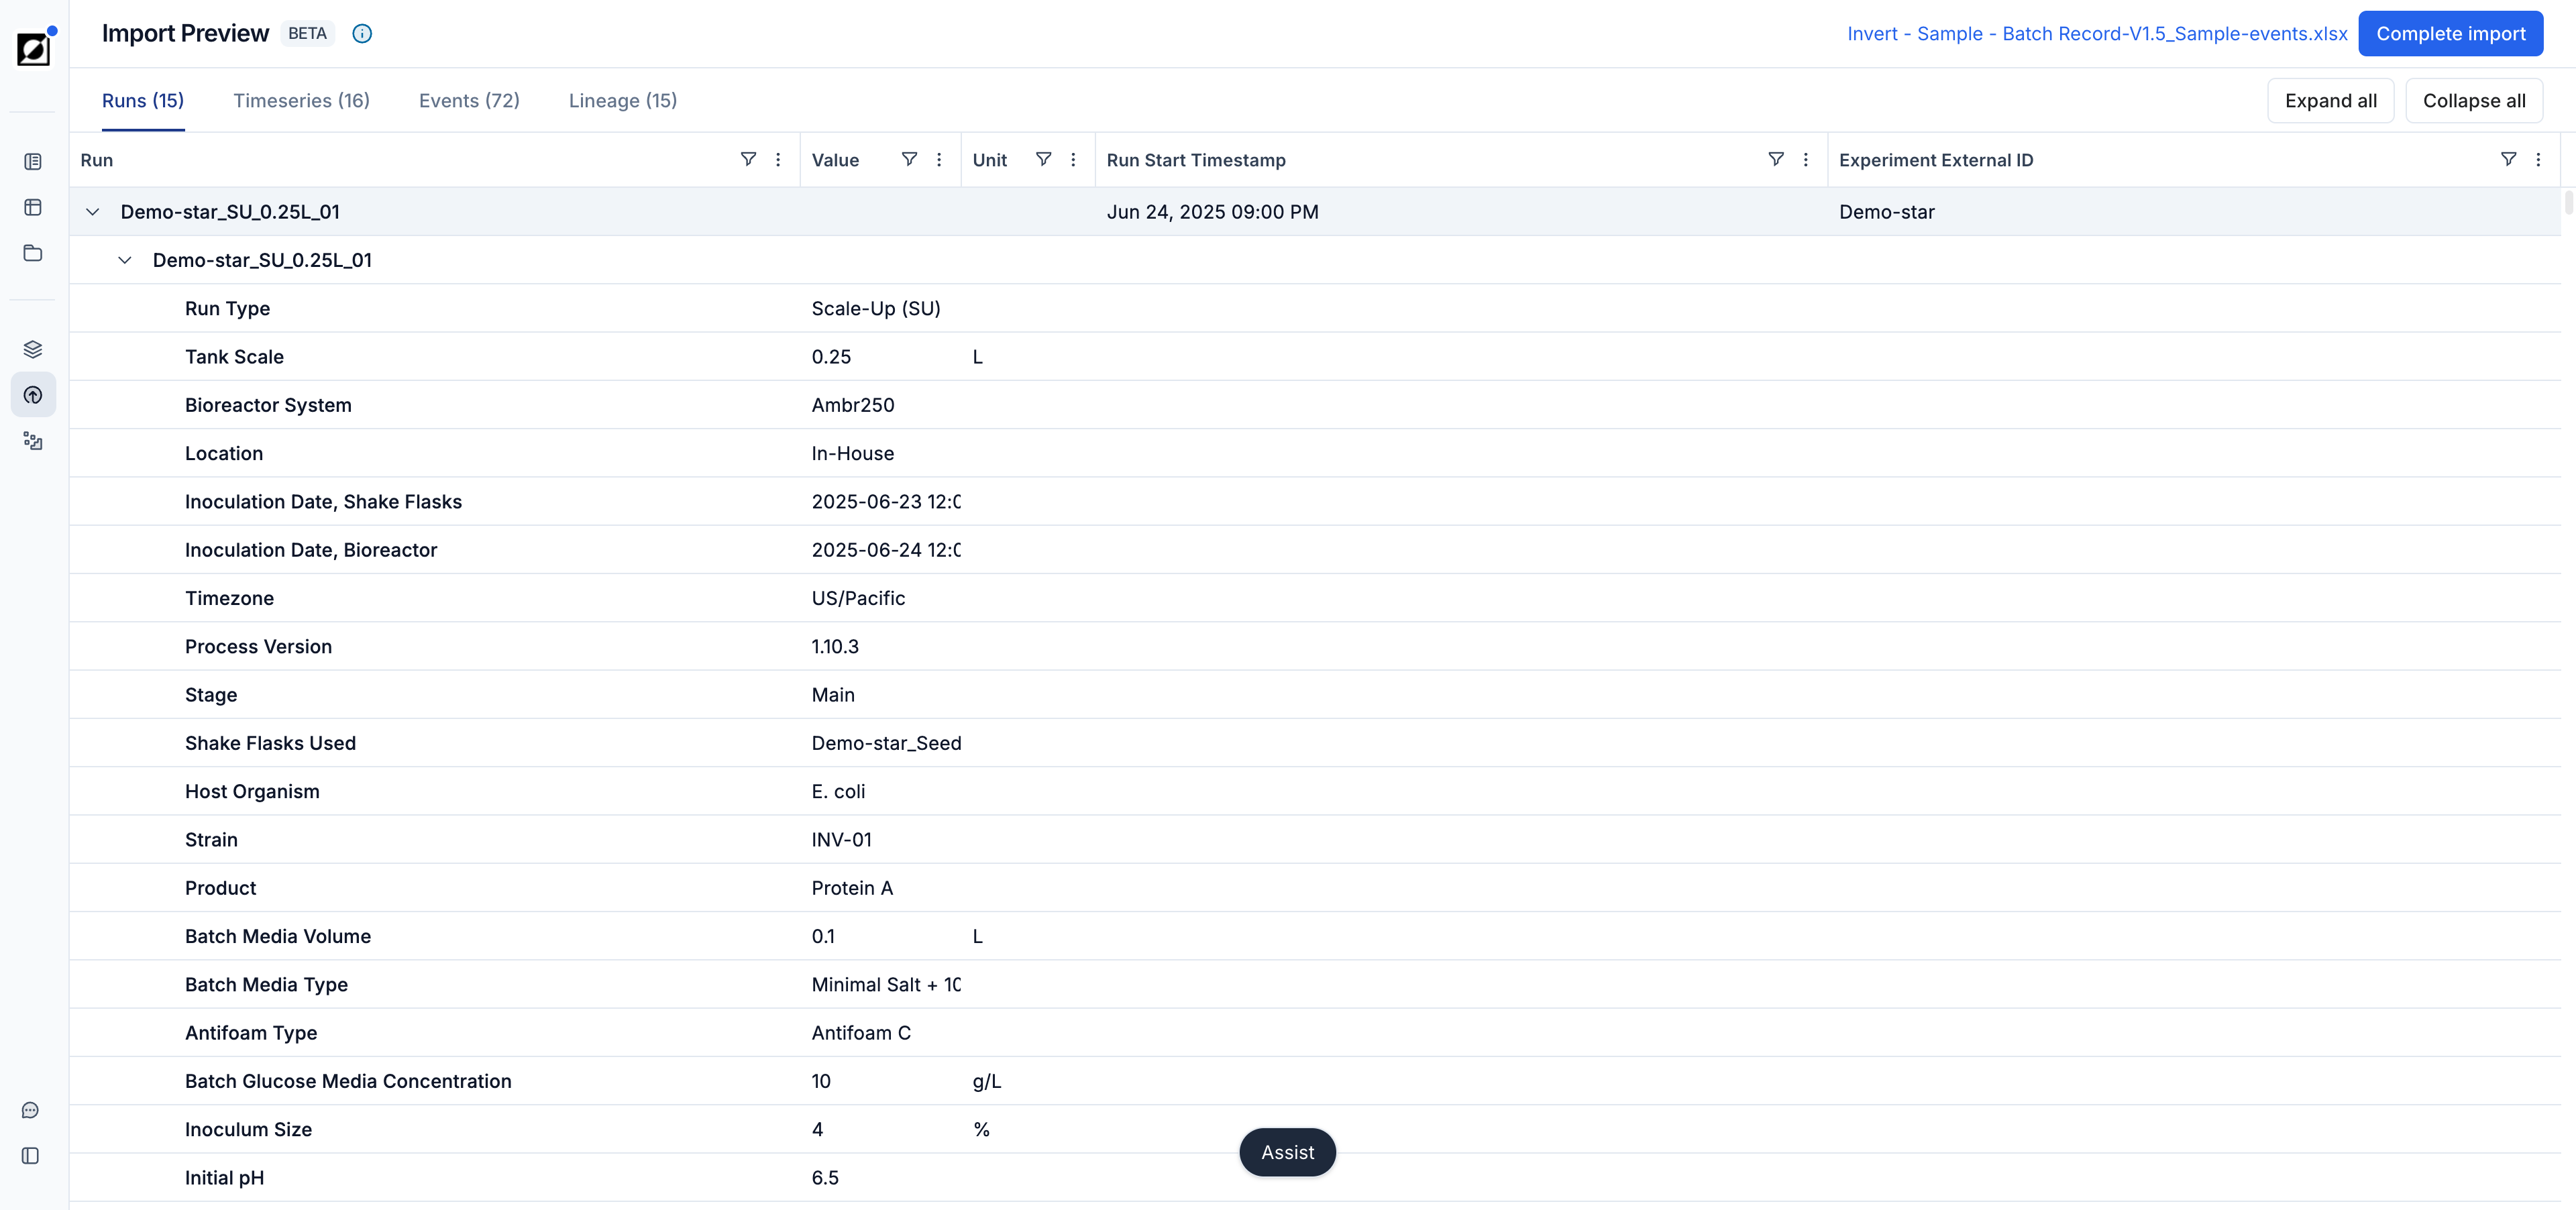
Import Preview lets you see exactly what will be imported before any data is committed. Use the Preview before import toggle to turn it on or off; it is on by default. If you upload several files at once, each file gets its own preview: use Previous file and Next file to move between them, or Dismiss all to discard every ready preview.
Invert processes the file and shows a structured summary of what would be created, organized into tabs (Runs, Library, Timeseries, Events, and, where the file contains them, Lineage, Samples, and Measurements) so you can catch mapping issues or unexpected data before they land in your workspace. Each tab name shows a count of items, and tabs with zero items are grayed out and non-clickable. The Library tab lists the unique metrics and properties detected in the file so you can verify nomenclature before approval. Click Complete import to proceed with the actual import, choose Dismiss from the button's menu to discard the preview without importing anything, or go back to adjust the file or mapping.
Click the info icon next to Complete import to open Import details, which shows who created the preview (Triggered by) and, once assigned, who it is Assigned to. Anyone who can stage imports can use Assign to… to hand a preview to a colleague who can complete imports; only eligible users appear in the assignee list, and the selected colleague is notified. If you can't complete imports yourself, Assign to… replaces Complete import as the main button.
The preview is based on the previewed file only. If other files are processed at the same time, the final result can differ.
Mapping Guide
- Run Data
- Description: Metadata associated with a run, including its lineage
- Example: LOT#, Reactor ID, Site, Operator, Input Run
- Mapping: 'Run Data'
- Required Columns:
- Run
- Metric A (unit)
- Recommended Columns:
- Experiment
- Optional Columns:
- Input Run — the name of the upstream run that feeds this run (for example the seed flask that inoculated a bioreactor). Creates a lineage connection shown on the run's Lineage tab. Each cell names one input run; a run can have several input runs. Import only adds connections — remove one on the Lineage tab.
- Material Stream — for organizations with downstream processing enabled, names the typed stream (load, pool, eluate, ...) the row belongs to, so one run can carry several streams.
- Unit Operation — for organizations with downstream processing enabled, the process step (for example Chromatography) the run belongs to.
- Start time (UTC), End time (UTC) — set the run's Run Start and Run End. A file with only
Runand these columns is valid. - See the Downstream Processing guide for how these columns build the purification train.
- Required Columns:
- Timeseries Data
- Description: Time-based metrics
- Example: Time (h) versus Temperature (**°**C)
- Mapping:
- Timeseries Data (absolute time)
- Required Columns:
- Run
- Timestamp
- Metric A (unit)
- Required Columns:
- Timeseries Data (relative time)
- Required Columns:
- Run
- Time (h) or Time (min)
- Metric A (unit)
- Required Columns:
- Timeseries Data (absolute time)
- Run Events
- Description: Notes associated with a run.
- Example: Reactor Foaming @ 24h EFT
- Mapping:
- Run Events (absolute time)
- Required Columns:
- Run
- Timestamp
- Event Type
- Required Columns:
- Run Events (relative time)
- Required Columns:
- Run
- Time (h) or Time (min)
- Event Type
- Required Columns:
- Run Events (absolute time)
- Invert Data
- Description: Import data from an Invert export file
- Example: Time (h) versus Temperature (**°**C)
- Mapping:
- Invert Data
- Required Columns:
- Export file structure generated by Invert
- Required Columns:
- Invert Data
Integrations Tab
The Integrations tab lists all configured data sources for your organization — hardware connectors, ELN connections, and other automated data streams. Each card gives the data source name, the date of the latest import, a Live pill while a continuous import is in progress, a Failed badge when the last import failed, and a Manual badge for sources that are fed by file upload. Clicking a data source opens its detail page where you can review the connection configuration and its import activity. Connectors opens the connector overview for your organization.
Import History
Navigate to the Import History page for an overview of all historical file imports. Use the Manual and Integrations toggle to switch between file uploads and integration imports. The list columns are Source data, Mapping, Status, Created, Created By, and Assigned to; imports staged by Assist are marked Via Assist and imports created by an Automation are marked Via Automation. Files uploaded together are grouped under one entry, with an overall status for the upload (for example, Completed with dismissals). Select View on an entry to open the import, where you can see the runs and metrics created and download the original source file.
Use the filters above the list to narrow it down by run, mapping, source data file name, who created the import, creation date, or status. Choosing Show related imports from a run's actions menu opens this page with the run filter already applied.