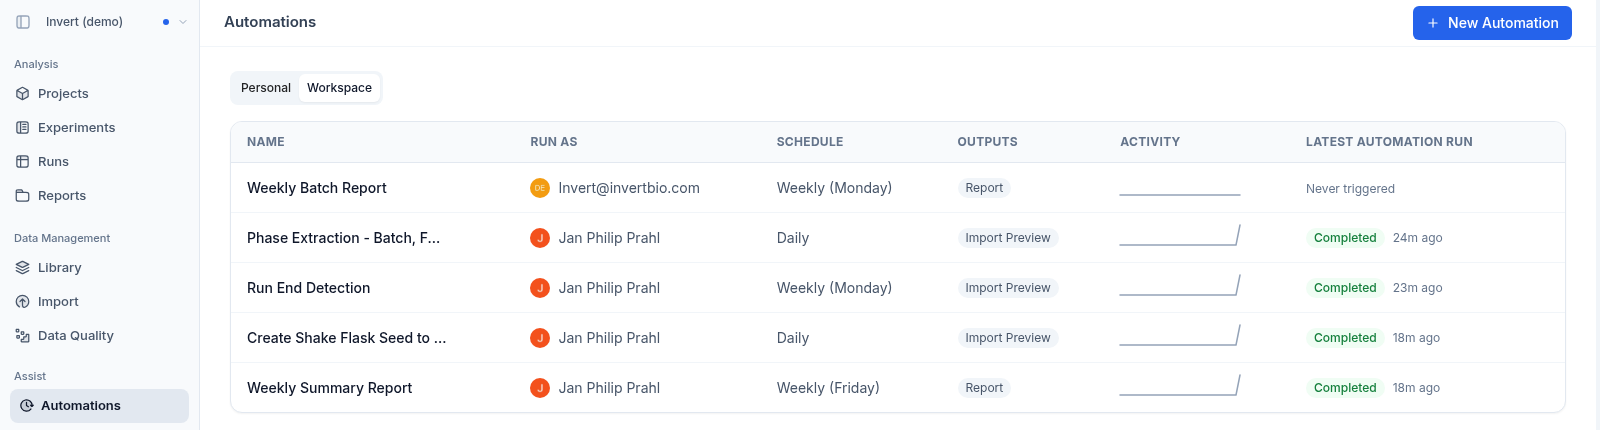
What you can do with Automations
- Generate periodic reports: Produce a batch summary or campaign report every Monday morning, ready for the team before standup.
- Stage data imports on a schedule: Automatically stage incoming instrument data for review at a fixed time each day.
- React to incoming data: Trigger an analysis or notification as soon as an import succeeds or fails, instead of waiting for the next scheduled run.
- Reduce repetitive work: Any analysis you would otherwise run by hand on a recurring basis can be turned into an Automation.
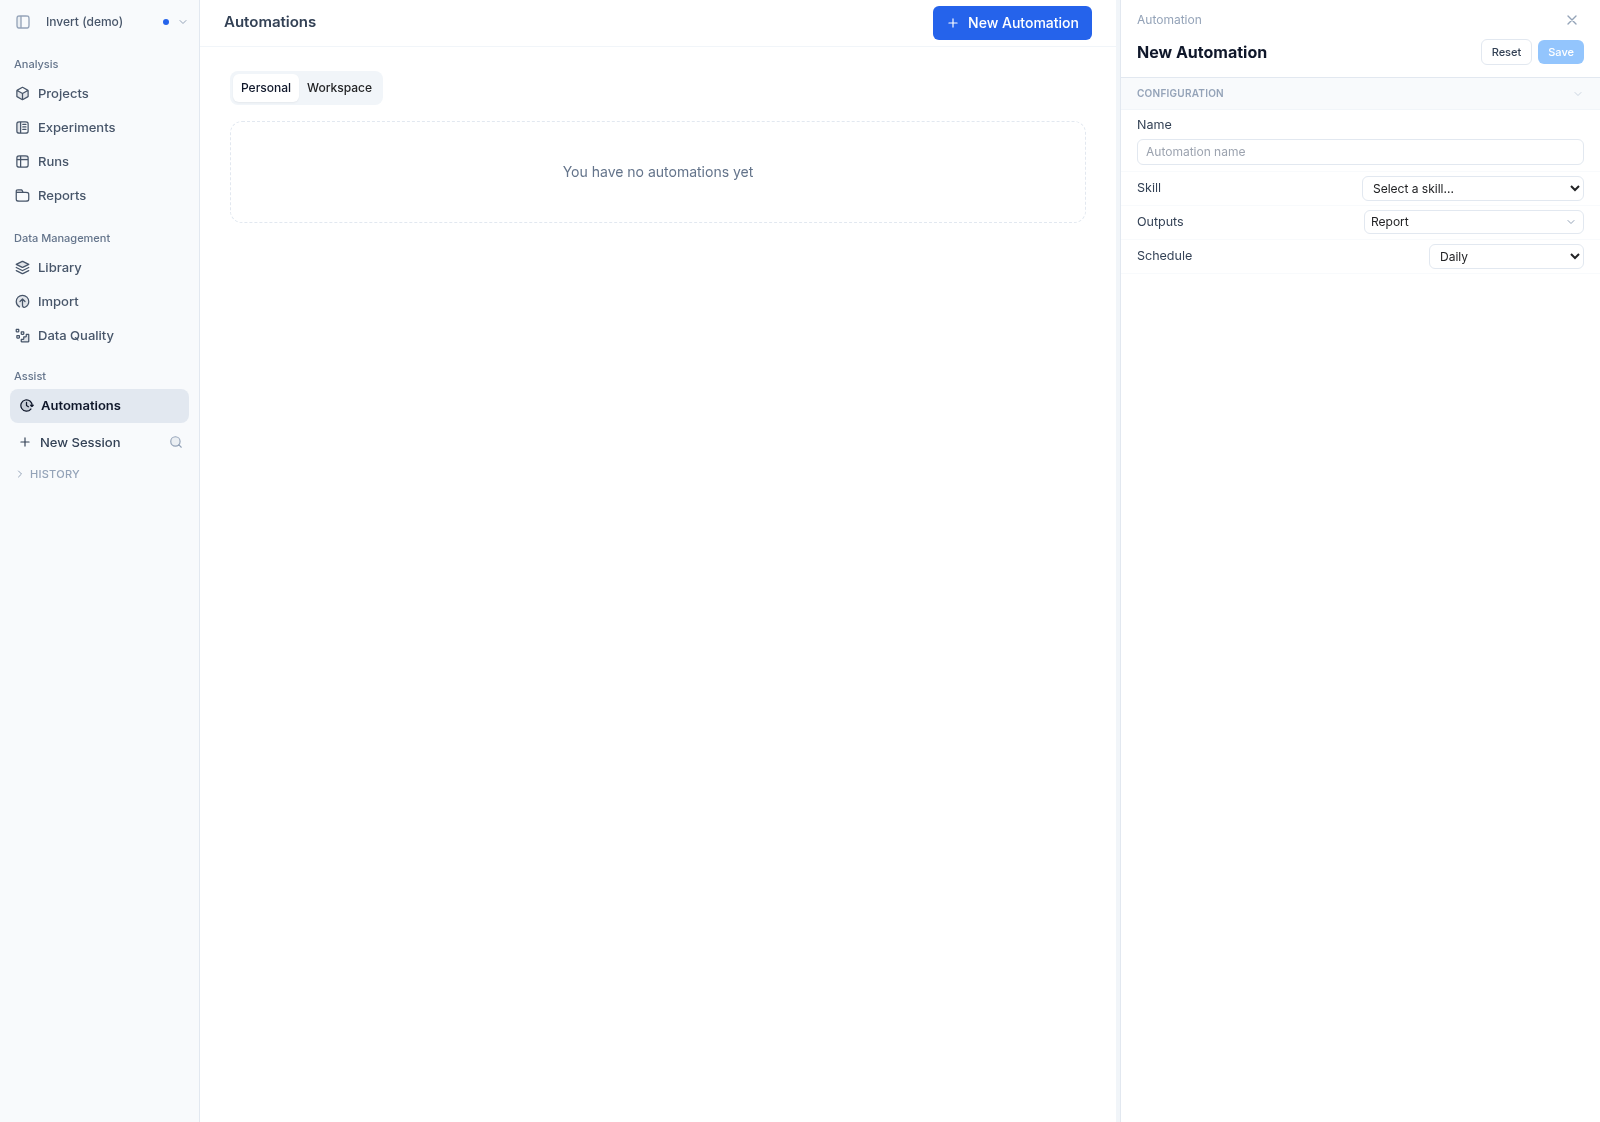
Creating an Automation
- Open the Automations page from the sidebar.
- Click New Automation.
- Give the automation a descriptive name.
- Select a Skill — this determines what the automation does when it runs. If the skill you need does not exist yet, the skill picker offers to create it for you.
- Choose Outputs — select whether each run produces a Report, an Import Preview, or both. Every run also creates an Assist session you can review.
- Set a Trigger — either a schedule (daily, or weekly on a specific day) or an import event: an import preview is ready, an import succeeded, an import failed, or a bulk import completed. For import event triggers, use Mappings to limit the automation to imports that use specific mappings; the default is Any mapping.
- Choose whether to Notify when started and Notify when finished — turn these on to get a notification each time the automation starts or completes. Notify when finished is on by default.
- Click Save.
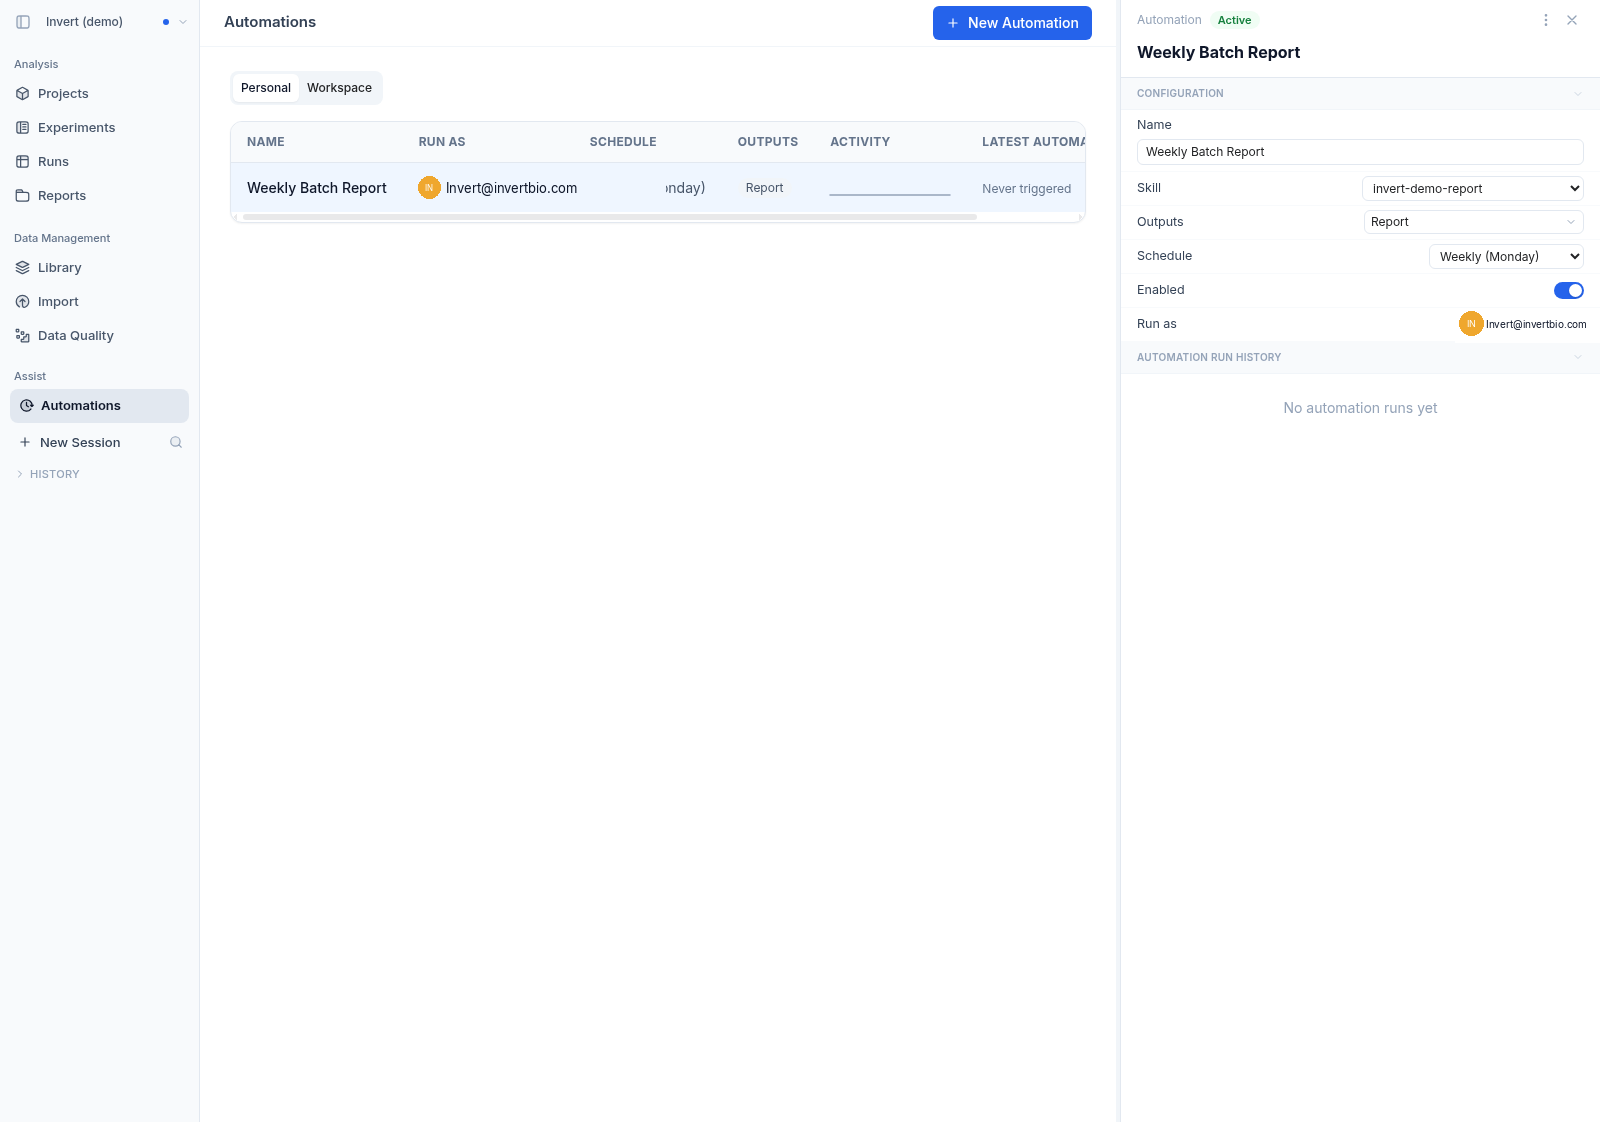
Managing Automations
Select any automation from the list to open its detail panel. From here you can:
- Edit configuration — change the name, skill, outputs, or trigger at any time. The Skill and Mappings labels link to the selected skill and mappings.
- Duplicate — create a copy of an existing automation as the starting point for a new one.
- Enable or disable — toggle the automation on or off without deleting it.
- Run now — trigger a one-off run immediately, outside the normal schedule.
- Take over — make future runs use your account instead of the account the automation runs as now. Take over is not available if the automation already runs as you.
- View run history — see past runs with their status, trigger source, duration, and links to the resulting report or session.
- Delete — permanently remove an automation you no longer need.
Finding automations
The list page has two tabs: Running as me shows only the automations that run under your account, while All shows every automation in the organization — useful to see what recurring analyses colleagues have set up and to avoid duplicating effort. Filter the list by trigger, outputs, or the account an automation runs as, and search by name.
Halted Automations
If an automation fails on consecutive runs it is automatically halted to prevent repeated failures. A halted automation shows a warning banner explaining when it stopped and why. To resume, fix the underlying issue in the linked Skill, then use Run now to confirm it succeeds — the automation re-enables on the next successful run.